IMPORTANT: If you have not already connected the SSD to your Raspberry Pi and powered it on, then go here to complete STEP 4.
Step 5b - Look up the IP Address of your Raspberry Pi
If you already know the IP address of the Raspberry Pi, skip to step 5.5 below.
If you don't already know the IP address of the Raspberry Pi, then you may be able to discover it by logging into the web interface of your router and looking for it in the list of connected devices. Alternatively, you can use an IP address scanner to look it up, which is the method we will be using here. We will be using 'LanScan' which is available from the Mac App Store. The basic version is free.
If LanScan is already installed, open it now, and skip to Step 5.4 below.
Step 5.3 - Install LanScan IP Network Scanner
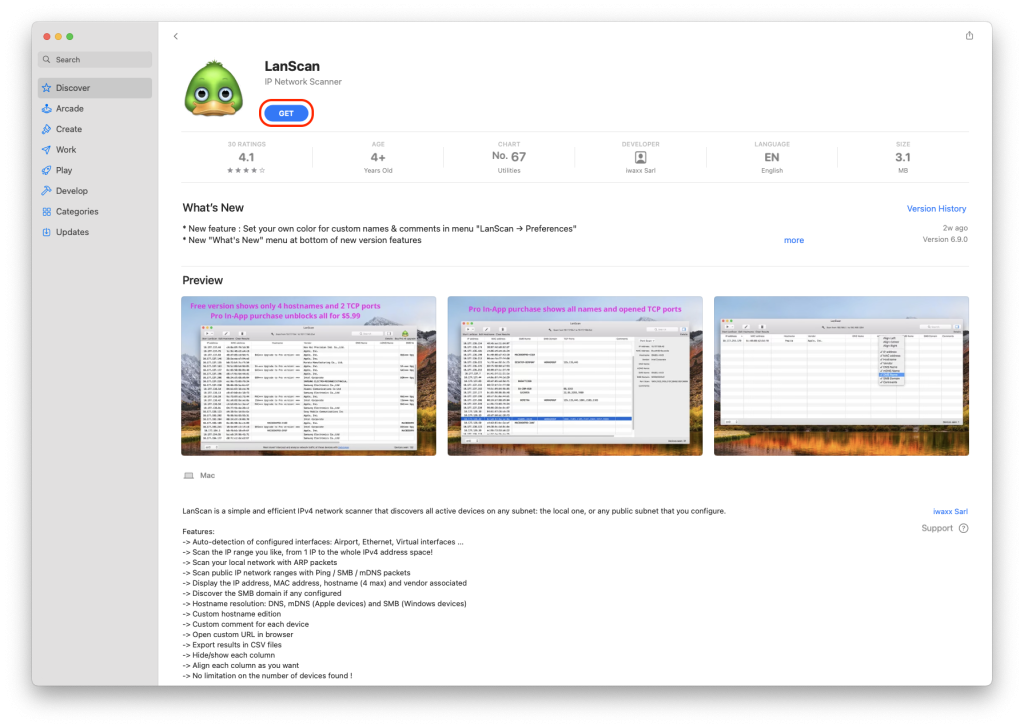
Click here to open the LanScan page in the Mac App Store.
Click on the blue 'Get' button. (It may also be labelled 'Install' or 'Update' if you have used LanScan before.)
If the button says 'Open' then the current version of LanScan is already installed. Click it and skip to Step 5.4 below.

If prompted, enter your Apple ID and password.

You may next be prompted for your payment information. You will need to provide this in order to download Apps from the Mac App Store, even though this version of LanScan is free.
LanScan will then be downloaded. Once it has finished installing, click the 'Open' button, to launch it.

Step 5.4 - Lookup the IP address of the Raspberry Pi
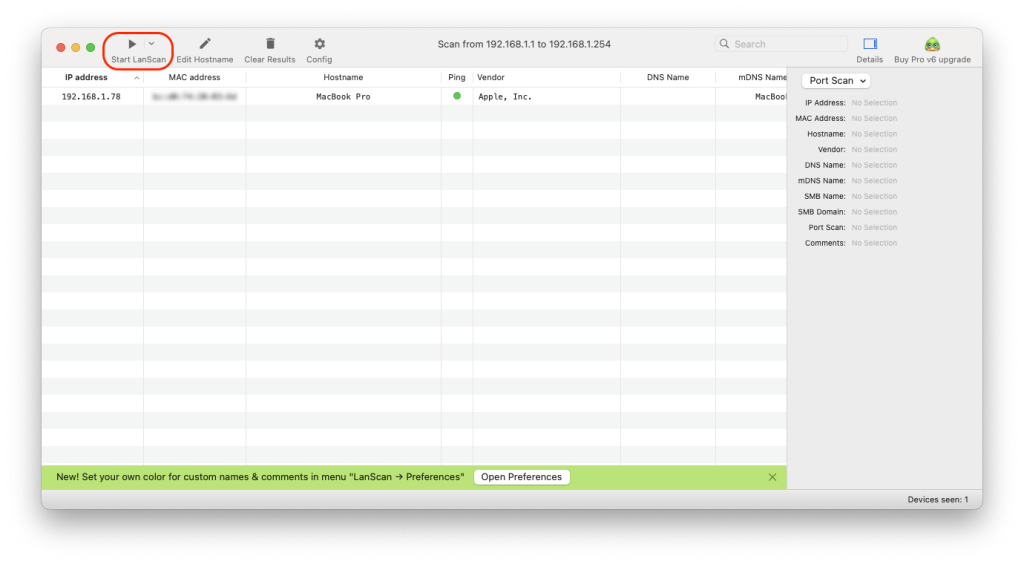
Click the 'Start LanScan' to scan the IP addresses on your local network.

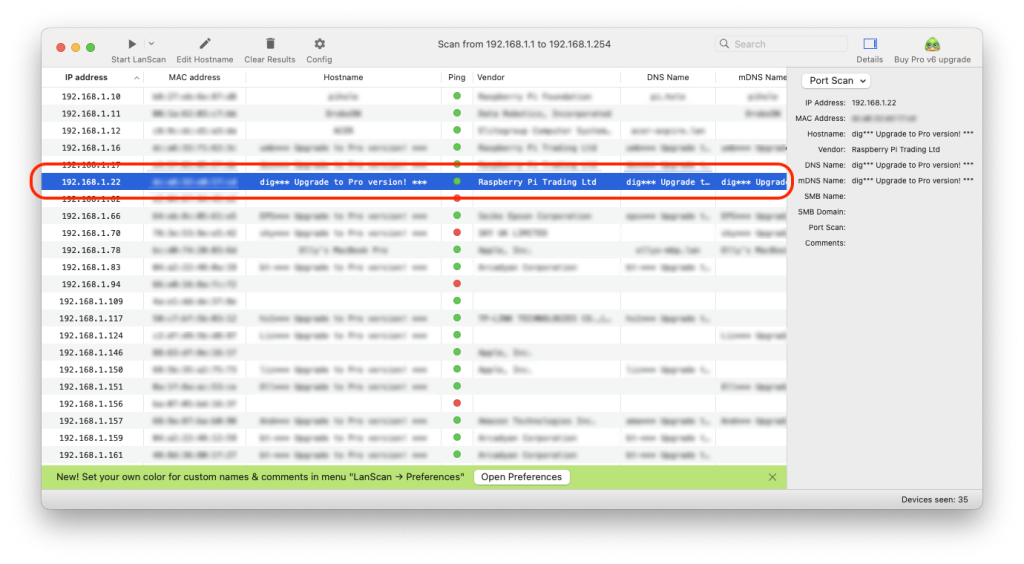
Look through the results, and locate the DigiNode hostname, and note its IP address. If you have the free version of LanScan the DigiNode hostname will only display the first three letters - e.g. 'dig***'. You should be able to identify it by also checking the Vendor column for 'Raspberry Pi Trading Ltd'. If nneeded, you can upgrade to the Pro edition of LanScan but it shouldn't be necessary.

Step 5.5 - Connect to the Raspberry Pi using SSH
Return to iTerm 2, and at the command prompt, enter the ssh command with the IP address from the previous step e.g. ssh [email protected].
When connecting for the first time, it will then ask you if you want to continue. Type the word 'yes' at the prompt and press return.

At the next prompt, enter the password you created in STEP 3 and press return.

You are now connected to your Pi. You should see the 'digibyte@diginode' prompt. (or 'digibyte@diginode-Testnet')

NEXT: STEP 6 - Run the DigiNode Setup script on your Raspberry Pi
To proceed to Step 6, click here.
To return to the One Page Setup, click here.
